超声波测距模块在很多智能循迹、避障小车中有着很广泛的应用,因此,我们本期教程来简单说说超声波测距模块的使用
在本教程中使用的超声波传感器为HC-SR04 外观如图所示
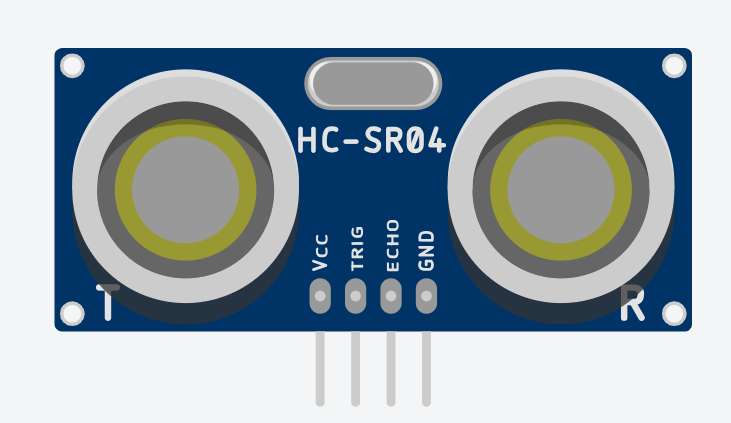
实验用具
- Arduino板一个
- 超声波传感器一个
- 面包板一个
- 杜邦线若干
那让我们正式开始吧!
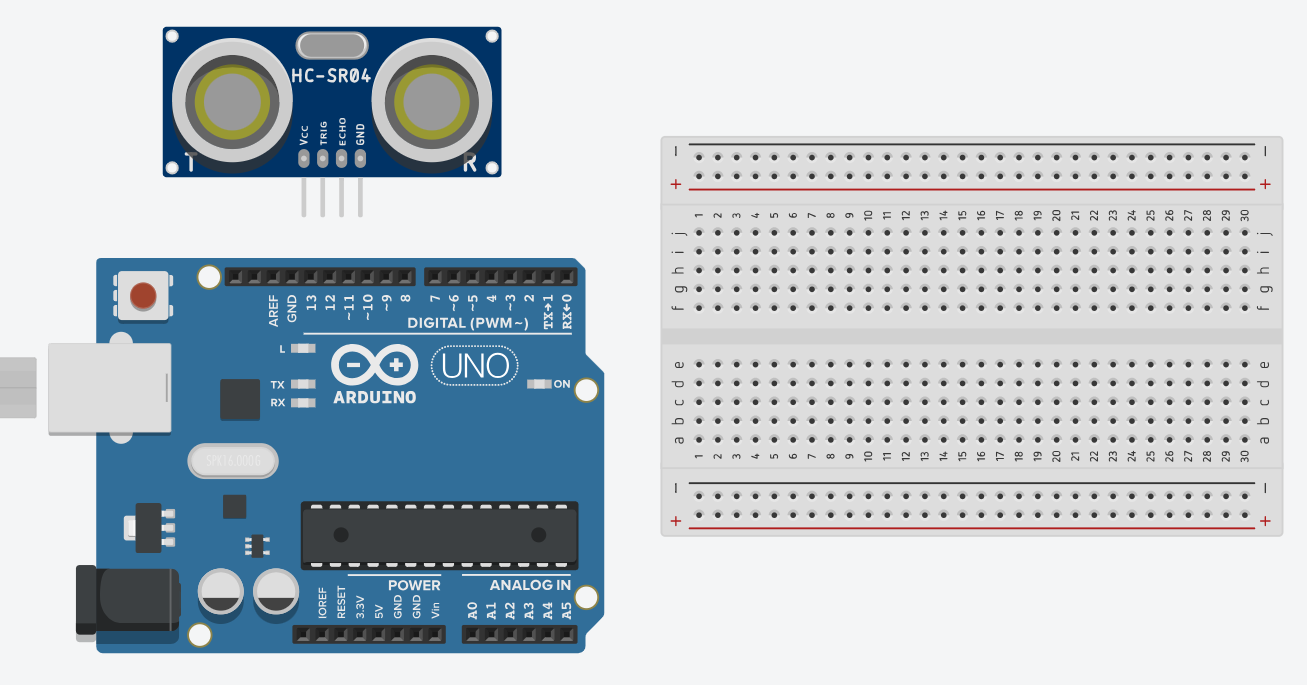
首先让我们简单认识一下它,HC-SR04总共有四个引脚,VCC接5V电源,GND接地
Trig是触发信号输入端,可以理解为发射端 Echo是回响信号输出端,可以近似理解为信号输出端
1在正式开始教程之前,我们需要简单分析一下这个装置的原理我们都知道,声音在空气中的传播速度可以大致认为是340m/s,那么我们的超声波测距装置在工作时首先会向前方发射超声波,同时开始计时;声波遇到障碍物会返回,当接收器接收到信号时就会停止计时,这样,我们有了运动速度和运动时间,那么我们就可以近似计算出物体与障碍物之间的距离了。 (但实际的原理并非如此简单,更详细的原理在此处不做具体说明,感兴趣可以自行搜索)
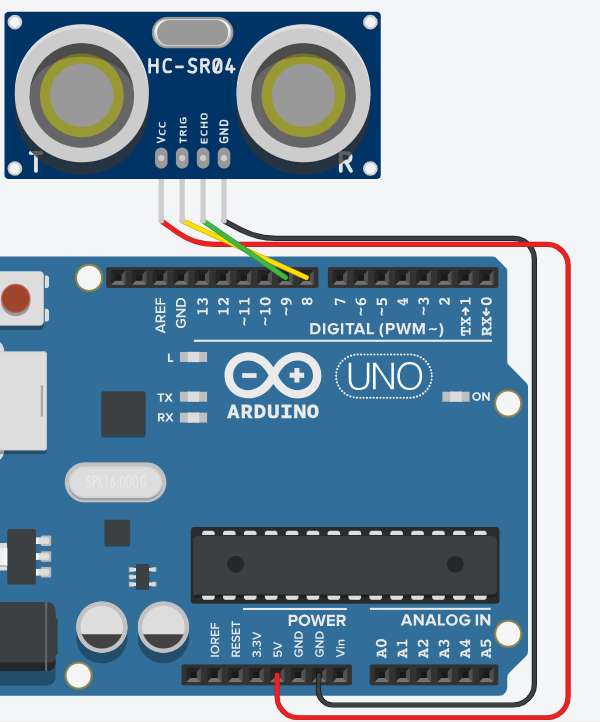
2首先按照如图所示方式接线
3接下来我们打开IDE
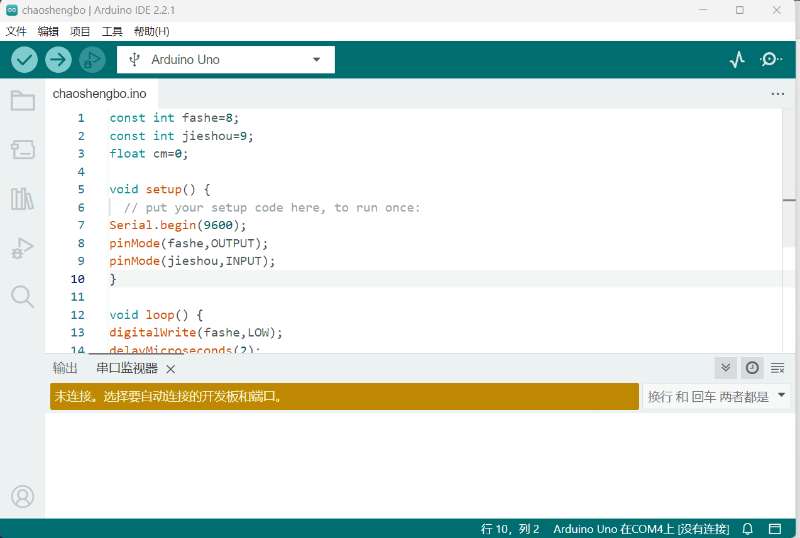
4首先定义好发射端和接收端,同时定义一个浮点型变量用来储存距离

5在setup函数里 我们将两个端口设置为输出模式,并且将波特率设置为9600使得我们一会可以从串口监视器中查看相应数据

6接下来进入loop函数
首先将发射端电压拉低,接下来延时2微秒,接着将发射端的电平拉高,延时10微秒后再将电平拉低这样我们就完成了一次超声波的发射
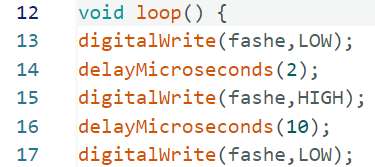
7.接下来是比较关键的一句,通过调用pulseIn函数,我们可以获取接收端电平由低到高的时间,除以58即可得到模块与障碍物之间的距离
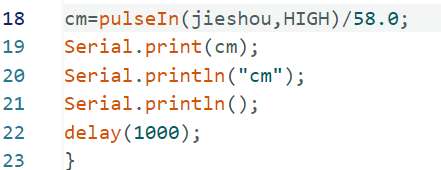
8.接下来的语句比较好理解
19行代码意在输出变量cm的值
20行代码意在输出cm,表示单位方便我们理解
21行代码意在换行
22行代码意在延迟
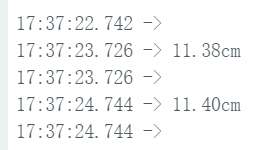
9.在我们烧录好程序后,打开串口监视器,我们就可以收到模块传回来的数据咯[太开心]
用户38599038 12个月前0
还会更新吗用户42327002 12个月前1
解压密码是多少啊用户67068886 12个月前4
nb确实nb就是哥可以换一个网盘嘛网速限制😂太恶心了kk牛波一1年前7
必须支持,太给力了帕格劳劳1年前0
真不错!点赞点赞!一位 WordPress 评论者1年前0
您好,这是一条评论。若需要审核、编辑或删除评论,请访问仪表盘的评论界面。评论者头像来自 Gravatar。